Now Reading: Ford Model T Restoration: A Complete Step-by-Step Guide
-
01
Ford Model T Restoration: A Complete Step-by-Step Guide

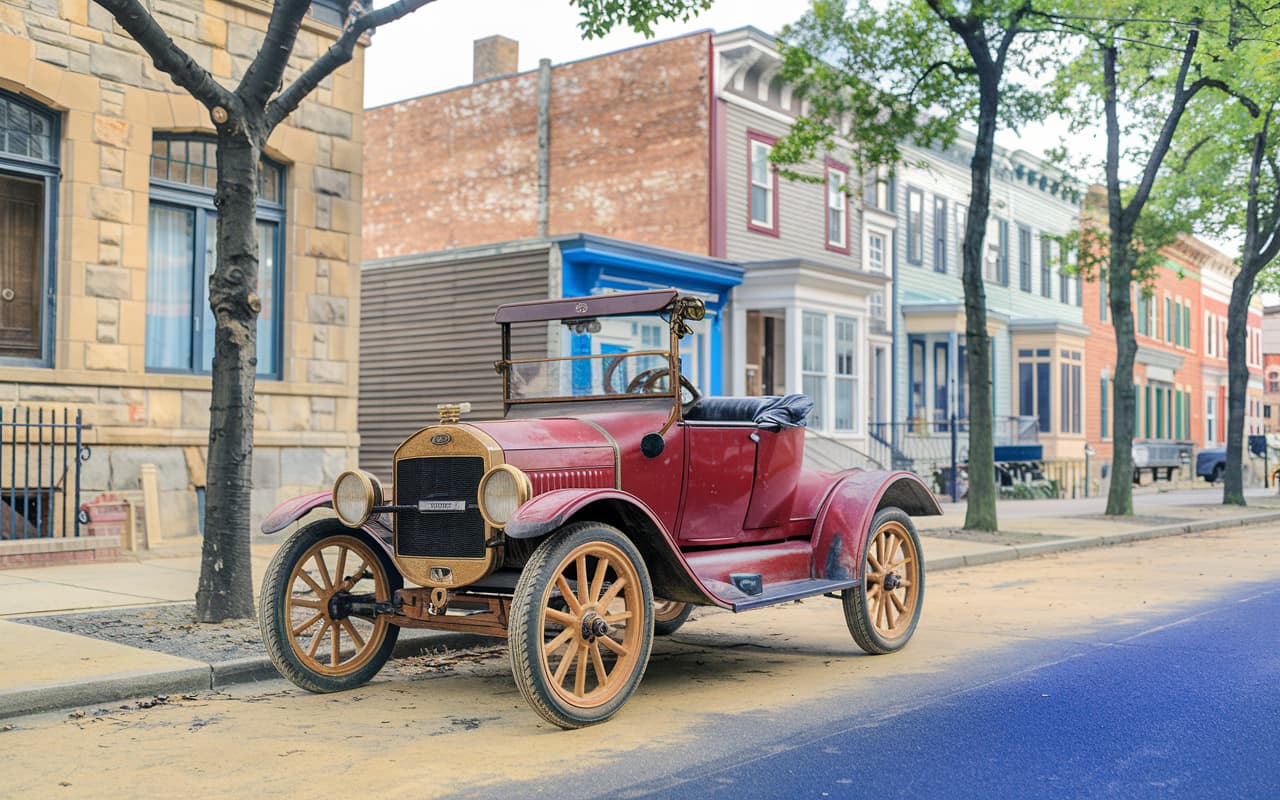
Ford Model T Restoration is an exciting and fulfilling project for classic car enthusiasts. This iconic vehicle, known as the car that put America on wheels, offers a unique opportunity to connect with automotive history. Whether you’re restoring your first Model T or adding to your collection, understanding the right steps can make the process smoother and more enjoyable.
Starting with a thorough evaluation of your Model T’s condition is crucial. Checking for rust, engine wear, and the state of the interior helps you plan the restoration carefully and prioritize your efforts. This early inspection ensures you address the most critical issues first and maintain the car’s authenticity.
With patience and the right resources, your Ford Model T Restoration can bring this vintage classic back to life. From disassembly to engine overhaul and finishing touches, each stage plays an important role in returning your Model T to its original glory and reliable performance on the road.
1. Evaluating the Condition of Your Ford Model T

Before starting the restoration, you need a clear picture of your Model T’s current state. A detailed inspection helps you plan effectively and avoid surprises down the road.
Inspecting the Body and Frame
Rust is the most common enemy of vintage cars. Carefully check the body panels, fenders, and running boards for corrosion or holes. Use a flashlight to spot hidden rust, especially in tight corners. Don’t forget to examine the frame for cracks, bends, or damage that could affect structural integrity.
Assessing the Engine and Transmission
Open the hood and inspect the engine block for oil leaks, worn gaskets, or damage. The Model T’s unique planetary transmission requires careful checking—look for worn bands, missing parts, or rough rotation when you turn the crankshaft.
Checking the Interior and Electrical System
The interior might be simple, but check the seats and upholstery for tears or wear. Test all dashboard controls and inspect the electrical wiring, magneto, battery, and lights. Replace any burnt-out bulbs or damaged wiring to ensure safety and reliability.
2. Gathering Essential Resources and Tools
Finding Manuals and Guides
Accurate manuals are priceless. Secure copies of the Model T Ford Service Manual and Model T Restoration Handbook to guide you. Also, explore online forums and websites dedicated to Model T restoration for additional tips.
Joining Model T Enthusiast Communities
Join local clubs or online forums to connect with fellow restorers. These communities offer advice, part sourcing, and motivation throughout your project.
Sourcing Spare Parts and Tools
Identify which parts you need and reach out to vintage parts suppliers or fellow enthusiasts. Gather essential hand tools like wrenches and screwdrivers, and check your manuals for any specialized tools.
3. Disassembling and Cataloging Parts
Systematic Disassembly Process
Disassemble your Model T methodically:
- Photograph each step before removing parts.
- Label every component and fastener to avoid confusion.
- Store small parts in labeled bags or containers.
Organizing Components
Use shelves or bins to keep parts organized by section (engine, transmission, body). Maintain a detailed inventory list and back up photos and notes digitally.
4. Restoring the Body and Frame
Tackling Rust and Corrosion
Remove surface rust with wire brushes or sandpaper. For stubborn areas, apply a rust converter. Avoid sandblasting vintage panels to prevent warping.
Repairing or Replacing Panels
Repair small holes or dents if the wood frame underneath is sound. For extensive damage, replace panels with ones matching original specs to preserve authenticity.
Preparing for Painting
Sand the surface smooth and apply an epoxy primer. Choose period-correct paint colors and apply thin, even coats. Finish with a clear coat for a glossy, protective finish.
5. Rebuilding the Engine and Transmission
Overhauling Engine Components
Check cylinders for wear. Replace rings, pistons, or babbit bearings as needed. Some restorers upgrade bearings for durability, but maintaining originality is key for many.
Restoring the Planetary Transmission
Inspect bands, drums, and gears. Replace worn parts and make precise adjustments for smooth shifting.
Testing Engine Performance
After reassembly, start the engine and listen carefully. Check for leaks, noises, and stable oil pressure. Take it for a test drive to ensure smooth operation.
6. Revamping the Interior

Upholstering Seats and Panels
Remove old upholstery carefully, noting how it’s fitted. Use high-quality reproductions that match the original buttoned leather style.
Restoring Dashboard and Controls
Sand and refinish wood and metal dashboard parts. Replace worn knobs or levers with authentic replicas to maintain that vintage charm.
Replacing Flooring and Mats
Clean or replace rubber mats. Repair or replace floorboards cut to original specs for a neat, authentic finish.
7. Revitalizing the Electrical System
Inspecting and Replacing Wiring
Replace brittle or damaged wiring with quality new wires, following original wiring diagrams.
Restoring the Magneto and Battery
Test the magneto’s voltage output and rebuild or replace if necessary. Ensure the battery holds charge and replace it if unreliable.
Ensuring Functional Lighting
Test all bulbs, clean sockets, and consider switching to LED bulbs for improved visibility without compromising the classic look.
8. Reassembling the Ford Model T

Aligning and Fitting Body Panels
Start with loosely fitting body panels to ensure alignment before tightening bolts.
Installing the Engine and Transmission
Carefully position the engine and transmission, aligning mounts and connections properly.
Connecting the Electrical System
Use your documentation to reconnect wires, battery, and ignition. Test each circuit thoroughly.
9. Painting and Finishing Touches

Choosing the Right Paint
Select automotive enamel or acrylic lacquer in original colors. Have extra paint for touch-ups.
Applying Primer and Paint
Apply multiple thin coats of primer and paint using a spray gun, allowing each layer to dry completely.
Polishing and Detailing
Buff the paint to a glossy shine and polish chrome fixtures and interior trim for that showroom finish.
10. Testing and Tuning the Restored Vehicle
Conducting a Comprehensive Test Drive
Drive gently, listening for unusual noises and checking steering, brakes, and responsiveness.
Fine-Tuning Engine and Transmission
Adjust timing, carburetor, and transmission for smooth operation and performance.
Balancing Wheels and Aligning Steering
Balance tires and align steering to ensure a comfortable, safe ride.
11. Tips for Maintaining Your Restored Ford Model T
- Regular oil changes every 500 miles.
- Check coolant and lubricate chassis.
- Store in climate-controlled spaces with breathable covers.
- Disconnect battery during long storage.
- Participate in vintage car shows to stay connected and motivated.
Wrapping Up Your Ford Model T Restoration
Restoring a Ford Model T is a labor of love that rewards you with a rolling piece of history. From rusty relic to gleaming classic, your efforts preserve a legacy while delivering driving joy. Embrace the challenges, enjoy the process, and take pride in every mile you cover in your beautifully restored Model T.
Frequently Asked Questions
Begin by thoroughly evaluating the car’s condition, focusing on rust, engine, and interior.
Online forums, specialized vintage parts suppliers, and car shows are great sources.
Look for local clubs or online groups dedicated to Model T and vintage cars.
Basic hand tools plus specialized engine and bodywork tools based on manuals.
Take photos, label parts, and keep detailed notes for easy reassembly.
Related Posts

Stay Informed With the Latest & Most Important News
Previous Post
Next Post


Advertisement